Proxmox Datacenter Manager Alpha Install
🚀 PDM Alpha Announced
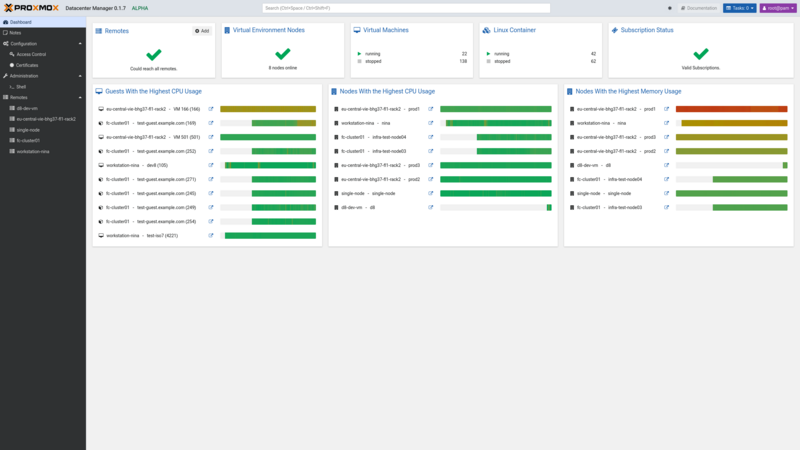
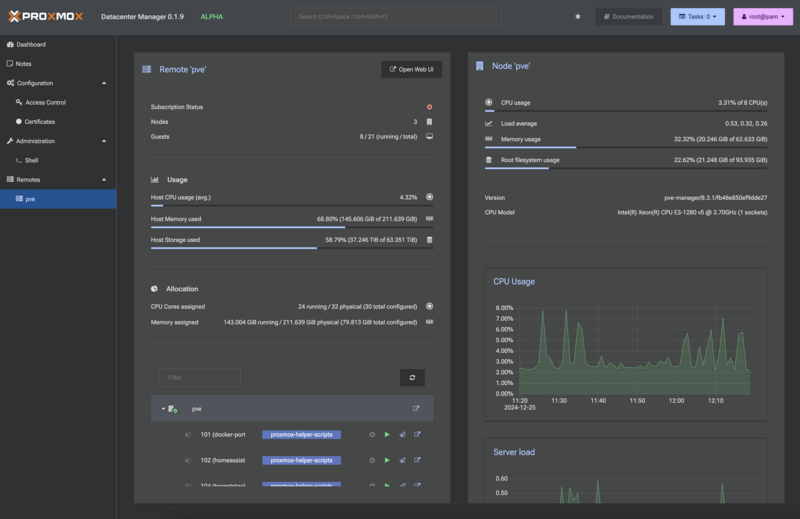
In mid-December, the Proxmox team announced the first alpha release of their Proxmox Datacenter Manager, a server management tool designed to provide a centralized overview of individual nodes and clusters.
Similar to the VMware vCenter Server, the new PDM will provide admins running Proxmox centralized monitoring, resource organization, simplified remote management, core configuration management and software-defined networking integration… long story short, if you run a Proxmox cluster this is a tool that will give you a consise overview of everything running in that cluster.
Proxmox Datacenter Manager - First Alpha Release
Proxmox Datacenter Manager Roadmap

The PDM is fully developed in the Rust programming language which offers a more modern web user interface experience; not only in its appearance, but also in terms of accessibility, speed and compatibility…
This is an Alpha release - what should we expect?
- Some features are still in development or may be incomplete
- Bugs and glitches are expected; Click ‘ALPHA’ in the title bar to report
- Documentation is in-progress, and will be available shortly
So OK, you’re a PVE r0ckstar and haven’t been scared away yet?? You’re a homelabber and just so happen to have a Proxmox cluster… maybe you’re a VMware convert but have been missing vCenter???
💽 Well let’s install it!!
You can use the official ISO image to install Proxmox Datacenter Manager on a virtual machine or bare-metal host.
Alternatively, you can install PDM on top of an existing Debian Bookworm based installation… I’ll suggest that we use one of our Proxmox nodes to create a new LXC container;
- Click on ‘Create CT’ in PVE
- Add a hostname and password; Click ‘Next’
- Select a Debian 12 Template - debian-12-standard_12.7-1_amd64.tar.zst; Click ‘Next’
- Select your storage and give it 16GiB; Click ‘Next’
- PDM requires 2 Cores, pick 2 or 4; Click ‘Next’
- PDM requires 2GB Memory, pick 2 or 4; Click ‘Next’
- Select Network - I chose to use DHCP; Click ‘Next’
- Select DNS - I left blank; Click ‘Next’
- Select ‘Start after created’; Click ‘Next’
Now we’ll use that new LXC container’s console to login as the root user with the password you setup. First, let’s update and upgrade the system:
apt update -y && apt dist-upgrade -y && reboot
Add the Proxmox Datacenter Manager apt repository:
echo 'deb http://download.proxmox.com/debian/pdm bookworm pdm-test' >/etc/apt/sources.list.d/pdm-test.list
We’ll also need to download the release key because we’re using a plain Debian installation:
wget https://enterprise.proxmox.com/debian/proxmox-release-bookworm.gpg -O /etc/apt/trusted.gpg.d/proxmox-release-bookworm.gpg
Refresh the package index:
apt update
Install the main packages:
apt install proxmox-datacenter-manager proxmox-datacenter-manager-ui
Find your local IP address:
ip a
And viola, you can visit the PDM dashboard in your browser and use the root@pam user to login:
https://IP-OR-HOSTNAME:8443
🎛️ First steps with Proxmox Datacenter Manager…
We’ll need to add our Proxmox VE remote(s). Open the Remotes tab and you can select ‘Add Proxmox VE’.
Enter your PVE cluster <IP/Hostname:Port>; you’ll need to navigate to that PVE node and copy/paste its fingerprint in order to connect it to PDM. It can be found in the Certificates tab and is generally named ‘pve-ssl.pem’; double-click it and you’ll find its fingerprint.
-
Paste it in PDM and click ‘Connect’. If you see ‘Connection OK’, you can press ‘Next’
-
Enter your ‘Remote ID’, ‘User’, ‘Password’ and ‘Realm’ (Normally ‘pam’)
-
Click ‘Scan’. If you see ‘Scan OK’, you can press ‘Next’
PDM should populate all your cluster nodes; click ‘Next’ to add them to PDM…

pr0fit!